Buy ONE Get ONE
Unlock the potential of Buy One Get One (BOGO) promotions, allowing your customers to either get a second item for free or at a substantial discount upon purchasing the first. This strategy can be particularly effective in retail scenarios like a shoe store offering "Buy one pair, get the second pair at half price."
Access your dashboard
- Log In: Enter your store admin panel.
- Go to Apps -> Markivo Discount & Upsell -> Standard Discount -> Buy One Get One -> Create.
Set up your campaign
Configure your campaign on the Create page under the Rules tab:
Campaign details
Name Your Campaign: Choose a unique name that shoppers will see, such as "Buy One Get One." Keep it concise—no more than 30 characters and without leading or trailing spaces.
Timing your promotion
Set the Dates: Input the start date and time, such as 20241101 at 12:00 AM. Only the start date is mandatory. If no end date is set, the promotion runs indefinitely. Note that the timezone is locked to your store's setting and immutable.
Discount rules
- Trigger Condition (Customer Buy(X)): Set the product conditions that will trigger the discount—options include all products, specific collections, or individual items. Note: The quantity for the trigger product is fixed at one.
- Discounted Product (Customer Get(Y)): Specify which products are eligible for the discount, with the same options as above. Note: The quantity for the discounted product is also fixed at one.
- Discount Type: Choose the discount method - percentage discount, fixed amount off, or completely free - and specify the discount amount.
- Usage Limits: Define how many times the discount can be applied per order. Zero allows unlimited uses.
Shipping considerations
Free Shipping Option: Decide whether the discount includes free shipping for the entire order. Note: Enabling this option grants free shipping for the entire order, regardless of the number of items included.
Optimize campaign visibility and engagement
This section guides you through enhancing the visual appeal and interactive elements of your promotions. Tailor your campaign's presentation across different touchpoints to maximize engagement and drive conversions.
Campaign block
The product detail page includes a discount module that clearly presents promotional details, enhancing customer engagement and purchase intent.
This module allows for extensive personalization, such as the campaign name, promotional messages, background styling, cart button texts, badge displays, and a free shipping progress bar.
Define promotion block name
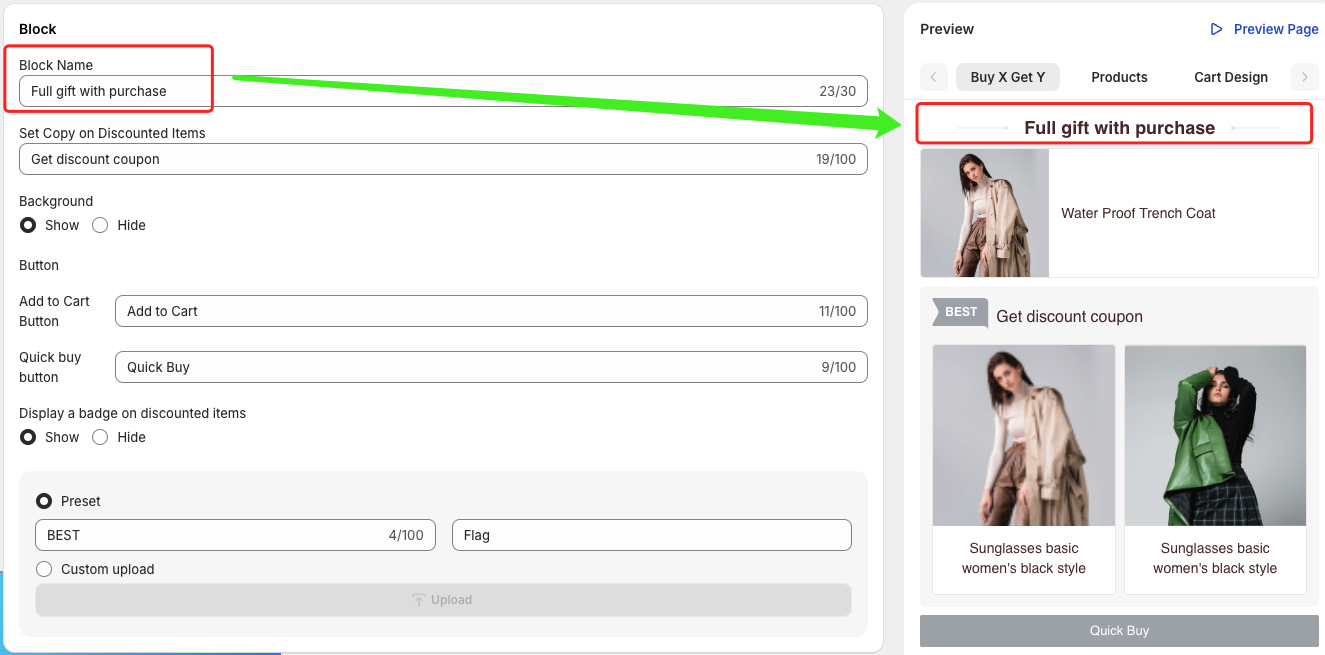
As shown above, you can customize the Block Name to create a prominent label at the top of the discount section. For example, you might use "Christmas Flash Sale" to highlight seasonal promotions. This label informs shoppers about active deals and encourages them to act quickly to take advantage of the discounts.
Customize gift message
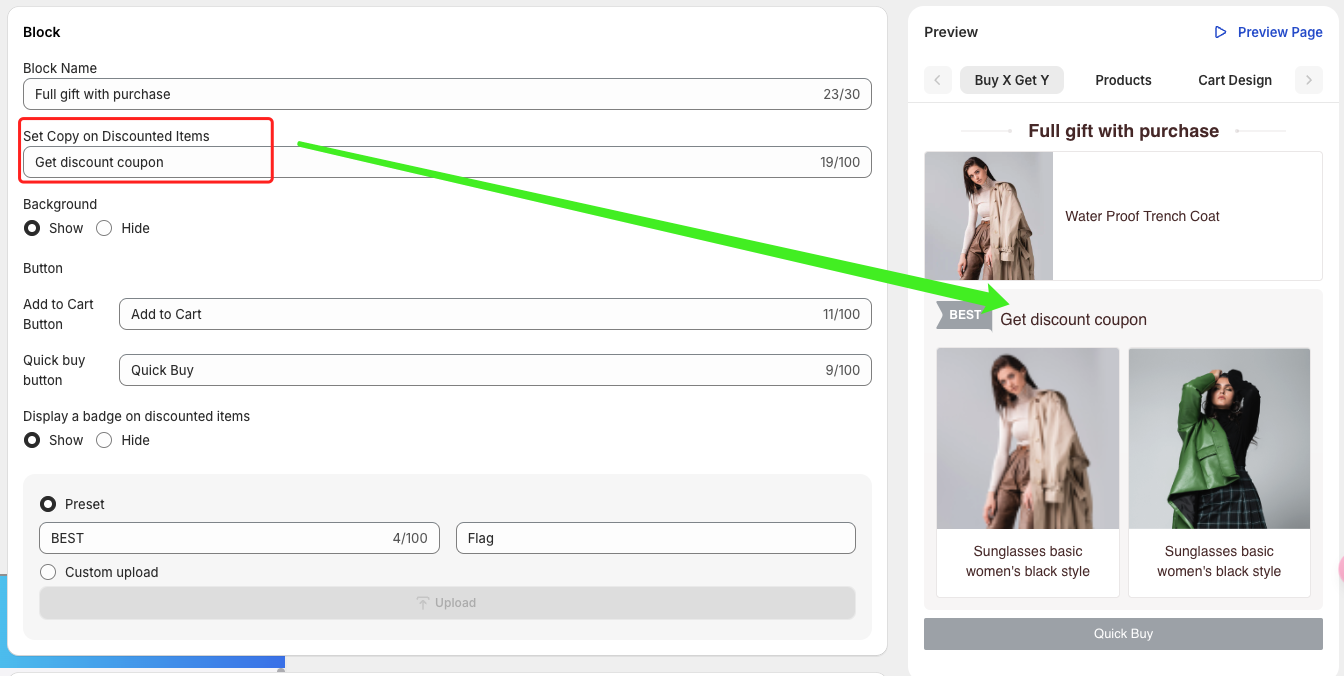
As shown above, you can personalize the Gift Row Title to clearly communicate that purchasing specific items qualifies customers for a gift. The gift can be offered either for free or at a reduced price, giving shoppers an extra incentive to complete their purchase.
Customize discount badges
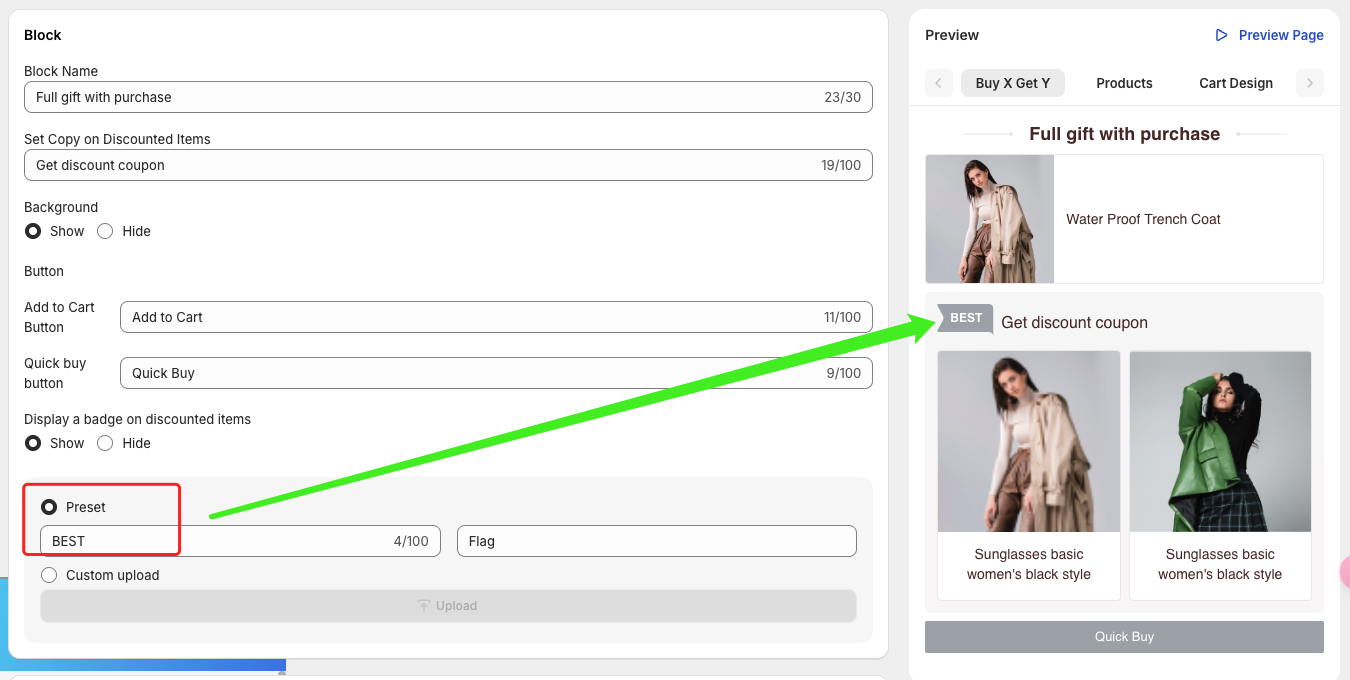
As shown above, you can add Discount Badges to make promotions stand out. Choose an attention-grabbing label or upload a custom SVG icon to enhance the visual appeal of your discount offers. These badges help draw customers’ attention to deals and make your promotions more noticeable.
Product card
You can add promotional badges to product cards at the image corners, below the price, or within the pricing area. Customize the text on these badges to help consumers quickly identify promotional items.
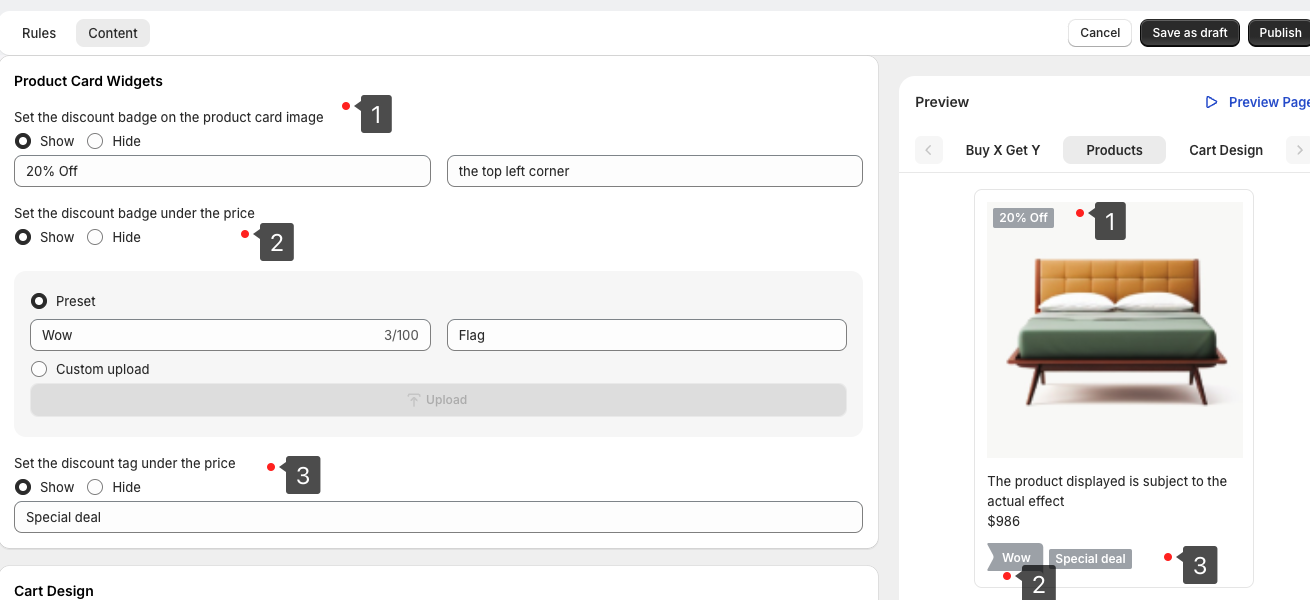
To encourage purchases and draw attention to discounts, we recommend featuring prominent tags on discounted product cards in store search results. This feature can be enabled and customized in the product card widget settings, ensuring customers can easily spot and understand the details of your discounts.
- Tag 1: Add badges to any of the four corners of the product image. You can customize the badge text to highlight specific offers.
- Tag 2: Place a banner badge below the price. You can customize the banner text or upload your own SVG image for a personalized design.
- Tag 3: Include a text badge below the product name. Use concise language or a catchy slogan to describe the product and its deal.
TIP
To keep the discount information clear and uncluttered, we recommend using only one prominent tag on each product card.
Cart design
Use the cart banner to highlight discounts in the shopping cart. When discounted items are added, a top banner automatically appears to alert customers to discounts and encourage quick checkout.
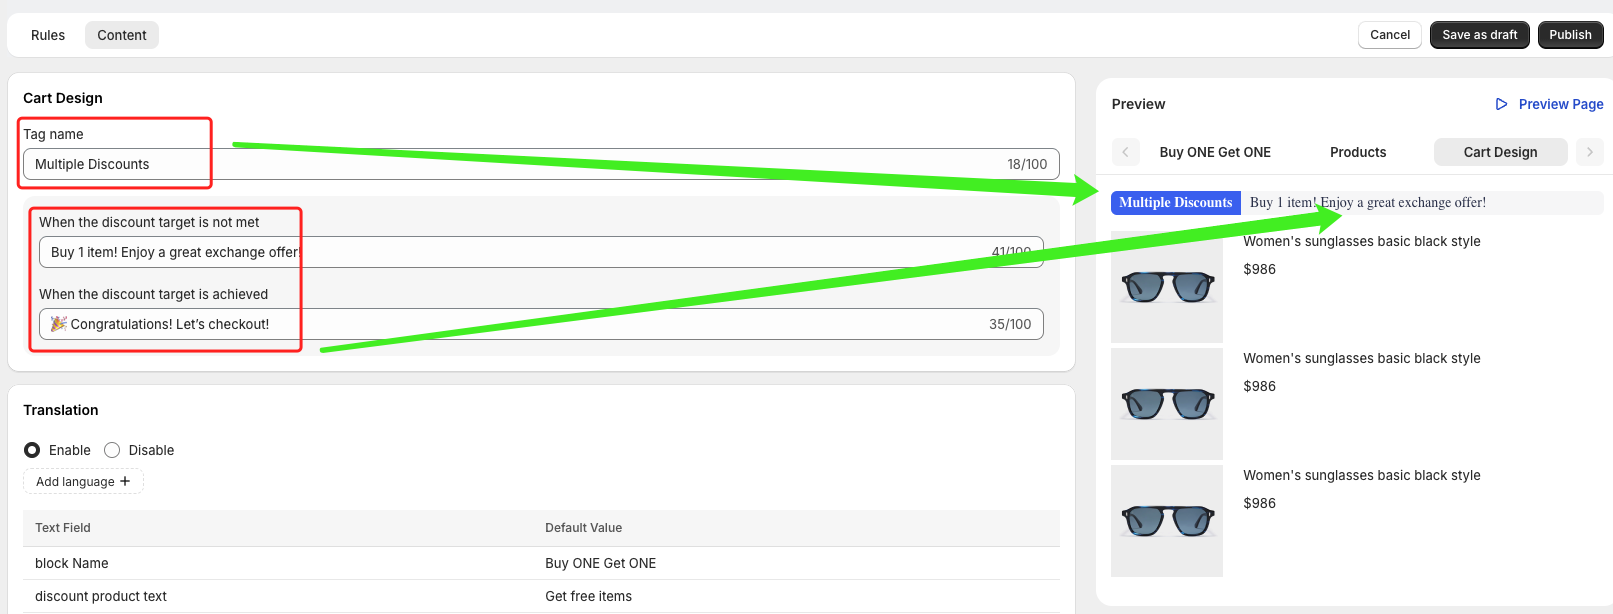
As shown above, when discounted products are added to the cart, you can guide customers with clear labels and messages. These messages help explain whether a discount condition has been met, is partially met, or requires adding more items to unlock additional savings. This setup makes it easy for shoppers to understand their cart status and motivates them to complete their purchase to maximize their savings.
Multilingual capabilities
Activate automatic translations to cater to a global audience, enhancing accessibility and market reach.
TIP
Branding Your Promotions: Tailor the look and feel of all promotional elements to align with your brand's aesthetic. For a deep dive into customization options, check out Brand Customization.
Finalize and launch
- Preview: Check your settings in the Preview panel.
- Deploy: Save as Draft for further refinement, or click Publish to launch the campaign and see immediate results.
Additionally, our Data Analysis service provides insights based on sales performance, allowing you to further refine your campaign setup.